Are you looking for some new ideas to improve your photography skills? Or maybe you want to take better photos at parties or events? If yes, then read on!
Photography has become a hobby for millions around the globe. From professional photographers to amateur enthusiasts, everyone wants to capture great moments through their camera lens.
There are various ways to improve your photographs. Some of them include learning from other photographers, taking classes, reading books and magazines, and practicing.
What we can do, is give you a few ideas on what you can do to improve your photos and make them just a tad more interesting and original.
Here is our list of creative photography techniques and ideas for you to try at home and outside.
Creative photography ideas you can do outside
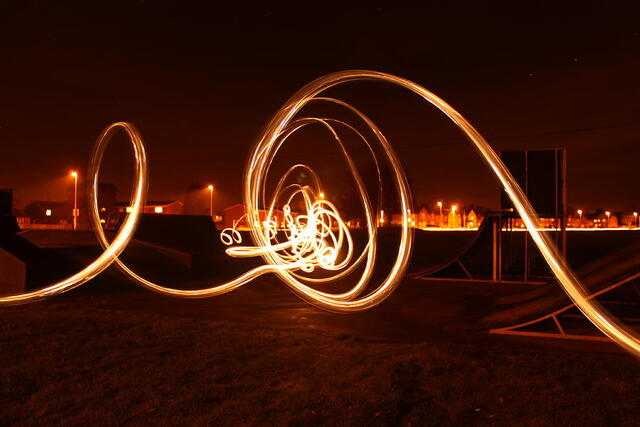
1. Light Trail Photography

You can use light trails to create interesting effects by highlighting items or compositions.
To create images like these, you’ll want to use a light source that moves across the subject.
To get good light trails, you need to take pictures using a long exposure time.
You should also consider the scene where the shot is taken. If the scene isn’t interesting enough, then you won’t get the desired results.
If you combine a picturesque location with the movements of light, you’re going to be able to capture some beautiful photos.
2. Light Graffiti
I’m sure you’ve seen photos shot during the night where someone draws something in front of the camera.
For this type of creative photography, bring some extra lighting equipment, and a tripod, and use a slower shutter setting. Be patient.
It’s important for the scene to be interesting. Next, stand in front of the camera and start “painting” away.
3. Go out for night photography after the rain
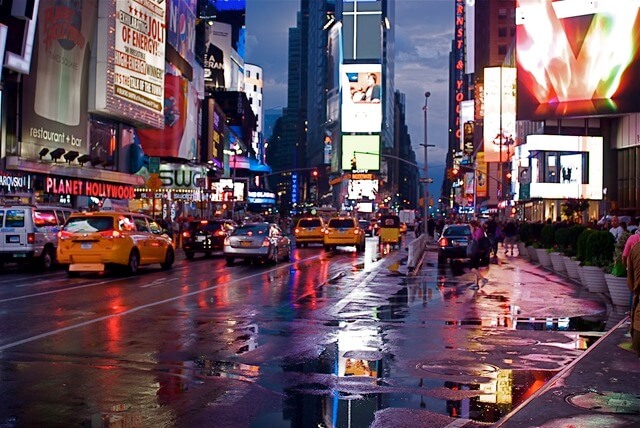
The reflected light from cities at night time helps you create a perfect composition.
Going outside when it’s raining isn’t always the best idea for your equipment. Even if your camera is well-sealed against water damage.
However, going out at night after the rain has stopped is a win-win for you and your camera equipment.
What would be gained by such a situation?
One of the biggest advantages is that wet surfaces create amazing reflection which can be great for experimentation. Especially if you’re in a particularly creative mood!
You can also look for puddling spots where you’ll see watery patches.
Try to look at what is reflected in the mirror and also try to alter your perspective so that what is reflected changes.
4. Try the tilt-shift photography effect

For the landscape photographer looking for new creative photography techniques, tilt-shift depth of focus is an effective tool.
Tilt-shift is a photography technique that will give your images a unique look.
Tilt-shifting is also known as miniature faking. It describes the entire concept quite well.
You can use this photography technique to make a miniature version of any place you want.
Usually, when you shoot photos, the plane of focus and the picture plane are aligned.
It means that you get an evenly deep focal point in the photo regardless of where exactly you choose to focus.
When you tilt the camera, those two planes aren’t perfectly aligned anymore.
Here’s what’s happening: You’re getting a new focus plane at an odd angle and that’s how this “focus tilt” is created.
If you want to experience the creative power behind the art of tilting and shifting images, try using one of these types of scenes for your subject matter.
5. Take to the skies
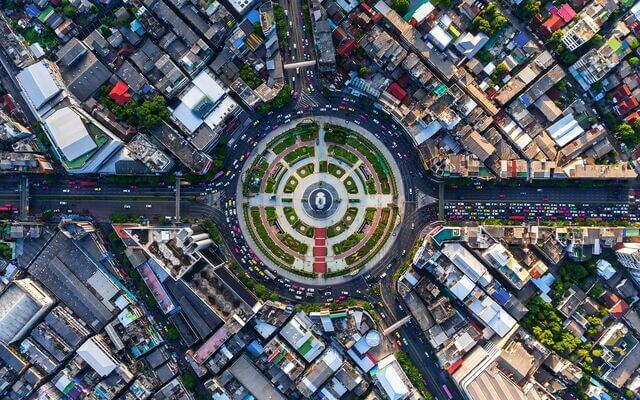
Aerial photographs offer us a unique perspective that we don’t often get in our daily lives.
Aerial photography provides us with an ideal basis for picture ideas that can be taken from a different perspective.
The DJI Mavic Pro isn’t cheap but I think it would be worth it for most people.
If you’re anything like me, you may need to wait until next time so you don’t blow all your money on your new drone.
6. Epic Panoramic and 3D Photography
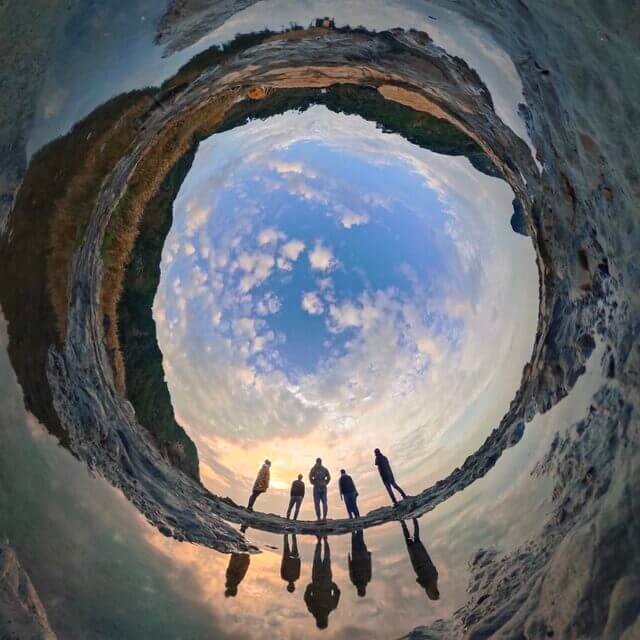
Photography isn’t just for capturing what a standard camera lens or even a panoramically wide angle lens can capture.
Some photographers shoot entirely from the ground up, producing incredible 360-degree panoramic images or even fully mobile 3D photos that can only be seen through a computer screen.
Creative photography ideas you can do at home
1. Photograph water droplets
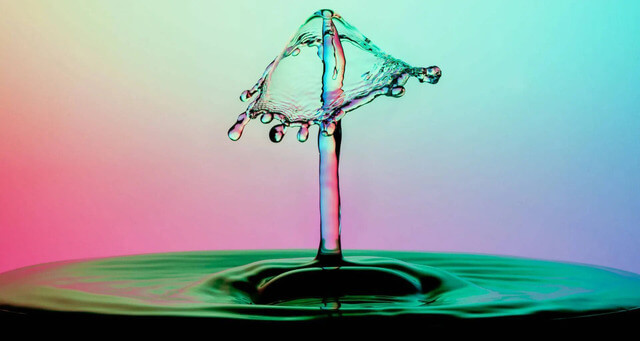
Water droplet photography requires special equipment, but the result is beautiful, and you can capture different splash types, backgrounds, and colors for years.
You’ll first need a camera with a Macro Lens.
You’ll also want a camera stand like a tripod, an external flash, a dropper, and a container of water.
The idea is to place your camera near the water so that you can capture images of the water from different angles.
Switch your camera to manual mode, then pre-focus on the center of the bowl.
Hold the water droppers high, drop some drops into the bowl, and as the drops get close to the water surface, take a picture.
Note: Water droplet photography involves lots of trial and error, even if you follow the simple DIY setup I’ve described here.
If you want your photos to look more consistent, you can buy special water droppers and rig equipment.
2. Photograph oil and water bubbles
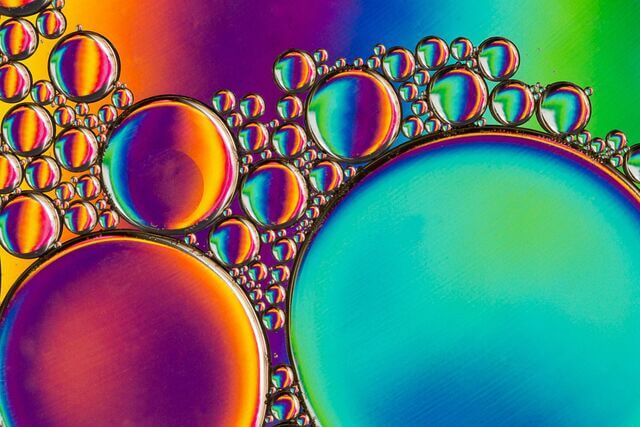
When oil and water mix together, they form the most beautiful bubbles.
But how do you photograph such an amazing effect?
Luckily, it’s not too difficult if you have a macro lens and a sturdy stand for your camera.
Mix oil and water together in a clear glass jar or bowl.
Use cups or wooden blocks to elevate the container.
Then place an interesting backdrop beneath the setup, such as colored paper, or even a printed photo.
Put your camera above the jar or bowl, then take pictures!
To create new bubbles, stir the mixture with a spoon occasionally.
Try new types of photography
1. Do Some Macro Photography
Macro (or close-up) photographs are much easier to take than most people realize.
You don’t necessarily require an expensive macro lens – just the gear you already own, plus an extension tube.
A 50mm prime lens and one or two extension tubes are enough to produce good close-ups, but it takes some practice to master them.
You can buy some inexpensive macro lenses for your camera if you want more capabilities than just using an extension tube.
Either choice, you won’t be sorry for having macro lenses in the end.
It’s one of the best ways for taking awesome pictures anywhere at any time.
My best macro photos are usually taken when I’m outside during the middle of the day.
2. Use a New Post-Processing Style
Experimenting isn’t just part of taking photos in the field.
It works just as well for post-processing work – especially since there are so many post-processing tutorials available online.
Try using double exposure post-processing techniques.
You could turn your image into something more abstract by combining several different photographs into one image.
You can also add text to images so they look like posters or magazine spreads.
You don’t necessarily have to be a Photoshop expert to create something interesting and creative. But you’ll certainly improve your editing skills by doing this.
3. Zoom Burst
It’s one of the simplest photography tricks on the list and requires no special equipment.
The concept behind the technique is simple: when you’re shooting at a fairly slow shutter speed, you zoom in or out from the subject.
If you use this technique, you’ll be able to blur the edges of the photo and create an effect where the viewer thinks they’re rushing toward the subject.
Experiment with your shutter speed, the rate at which you move through your image, the distance of your subjects from you, and your framing to produce all kinds of interesting images.
To give your images an interesting twist, try zooming by turning the camera body while holding the camera lens perfectly still.
This will give it an interesting spiral effect in combination with blurring the edge of the image.